![[My face!]](/assets/profile.jpg) Nicholas Tay
Nicholas Tay
2022-05-22
ThinkPad X230 + coreboot: success
A few weeks ago, I did it! – my Lenovo ThinkPad X230 is now officially corebooted :D … but it wasn’t without its hurdles.
Obtaining a programmer
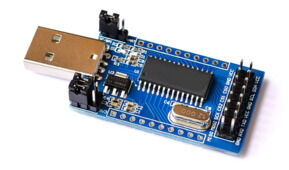
Originally, I wanted to try using my Raspberry Pi 4 as the programmer, but then it randomly died… I’m still hoping it will revive itself, but starting to lose hope. Then, my friend bought a cheap Chinese CH341A programmer, which when tested, only outputted 5V :( – our-hardware-mods-inadequate-selves then tried to perform the 3.3V mod to no avail, breaking the board.
He then bought another one, but this time we did some research on buying one that wouldn’t need the mod. This did actually end up working nicely, and for reference, if you don’t want to perform the mod, be sure to buy a ‘blue board’ programmer. There will then be a jumper in one of the corners that lets you switch voltages!
Building coreboot
I didn’t want to use any pre-built image, so naturally I went with building my own. The process was quite simple – I used Greg Carcia’s post and Chuck Nemeth’s page as references throughout the process, thanks to them! Note that to make the process easier, I used my Debian build VM to build the firmware. At first, I tried using my Fedora dev VM, but I couldn’t figure out how to get the cross-toolchain working properly :(
# Used 'depth 1' for faster clone since we don't need history anyway
$ git clone --depth 1 --recursive https://review.coreboot.org/coreboot.git
$ cd coreboot

$ cd util/ifdtool
$ make
Then, we need a backup of the BIOS firmware first to continue.
Backup time
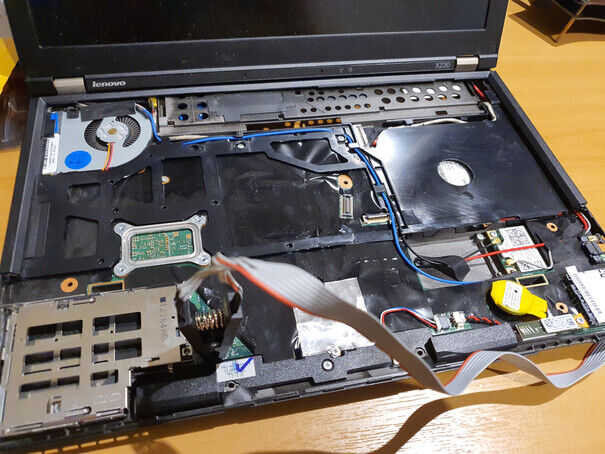
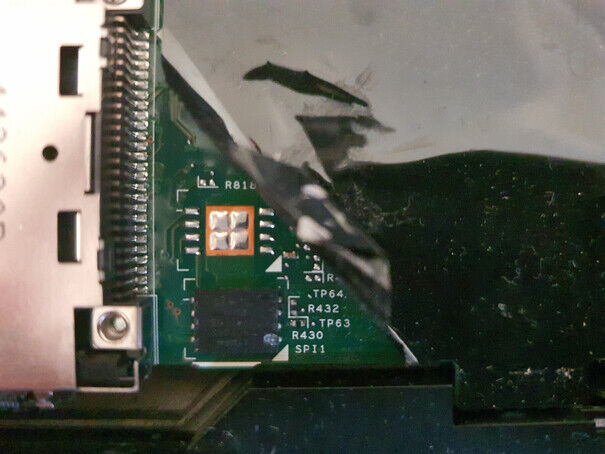
The X230 is different to the X220 in that it has two halves. As far as I understand, the top one is the one with the BIOS, and the bottom one has Intel ME and other stuff. We’ll need to read and flash to both though, to install coreboot but also wipe out Intel ME.
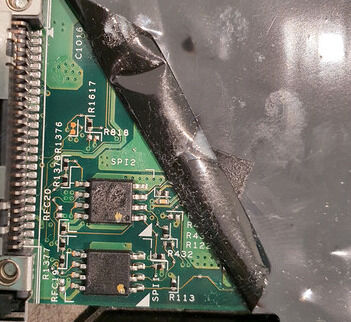
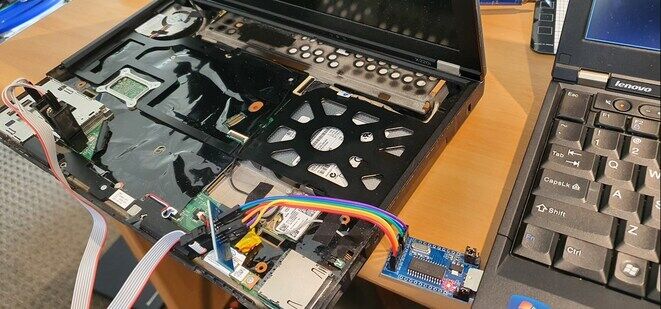
Be sure the battery and AC adapter are detached, then try hooking up the SOIC8 clip. It took a few tries to attach, but finally we got it…
# Attach to top chip
$ sudo flashrom -p ch341a_spi -r x230-top.bin
# Some options may come up. Try to read what's on the top of the chip - a torch + macro camera came in big here!
# (You can try to read some of it, and try to match up with the only possibly candidates as given by flashrom.)
# For me, it was:
$ sudo flashrom -p ch341a_spi -r x230-top.bin -c "MX25L3206E/MX25L3208E"

# Attach to bottom chip
$ sudo flashrom -p ch341a_spi -r x230-bottom.bin
# Same drill as above (they are different!); for me, it was:
$ sudo flashrom -p ch341a_spi -r x230-bottom.bin -c "MX25L6406E/MX25L6408E"

# Make up the complete dump (the usual format seems to be 'bottom+top')
cat x230-bottom.bin x230-top.bin > x230-dump.bin
Make sure to try dumping twice, and checking they are the same, e.g. by sha512sum – this is to ensure there was no weirdness while reading.
Then, be sure to keep these files safe in case of a brick, and/or to restore back to factory.
Finish building coreboot
(I’m pretty sure me_cleaner does not need to be done separately now, given the option in the main coreboot build.)
We’ll now need to extract out the needed modules from the flash dumps, and put them in the right spot.
$ cd util/ifdtool
$ ./ifdtool -x ~/x230-dump.bin

$ cd ../../
$ mkdir -p 3rdparty/blobs/mainboard/lenovo/x230
$ cd 3rdparty/blobs/mainboard/lenovo/x220
$ cp ~/coreboot/util/ifdtool/*.bin .

$ mv flashregion_0_flashdescriptor.bin descriptor.bin
$ mv flashregion_1_bios.bin bios.bin
$ mv flashregion_2_intel_me.bin me.bin
$ mv flashregion_3_gbe.bin gbe.bin

$ cd ~/coreboot
$ make nconfig
A neat little menu should now pop up, and we can customise to our heart’s content. The settings I changed were:
- Mainboard
- Mainboard vendor: Lenovo
- Mainboard model: ThinkPad X230
- Size of CBFS filesystem in ROM: 0x200000
- NOTE: This was boosted up as I wanted to use UEFI boot via TianoCore; probably leave it as 0x100000 for SeaBIOS
- Chipset
- Add Intel descriptor.bin file
- Add Intel ME/TXE firmware
- Verify the integrity of the supplied ME-TXE firmware
- Strip down the Intel ME/TXE firmware
- Add gigabit ethernet firmware
- Devices
- Display
- Framebuffer mode: Linear “high-resolution” framebuffer
- Display
- Generic Drivers
- PS/2 keyboard init
- Payload
- Add a payload: Tianocore payload
- NOTE: This was for UEFI; can just use SeaBIOS for good old BIOS boot
- Tianocore payload: CorebootPayload
- NOTE: Be sure to choose CorebootPayload!! UEFIPayload doesn’t work.
- I spent so long wondering why my X230 was bricked - turns out UEFIPayload does not support older devices like the X230; you have to use the older, unmaintained CorebootPayload (unfortunately) if you want UEFI.
- Secondary Payloads
- Load coreinfo
- Load nvramcui
- Add a payload: Tianocore payload
Then just Save -> Exit and make away!
Since we are dealing with the X230, after it finishes building you’ll need to split it back into the ’top’ and ‘bottom’ bits.
$ cp coreboot/build/coreboot.rom x230-coreboot.bin
$ dd if=x230-coreboot.bin of=x230-coreboot-bottom.bin bs=1M count=8
$ dd if=x230-coreboot.bin of=x230-coreboot-top.bin bs=1M skip=8
Flash time
With that out of the way, all that was left to do was to perform the flash.
# Attach to bottom chip (note chip model as before)
$ sudo flashrom -p ch341a_spi -w x230-coreboot-bottom.bin -c "MX25L6406E/MX25L6408E"
# Attach to top chip (note chip model as before)
$ sudo flashrom -p ch341a_spi -w x230-coreboot-top.bin -c "MX25L3206E/MX25L3208E"
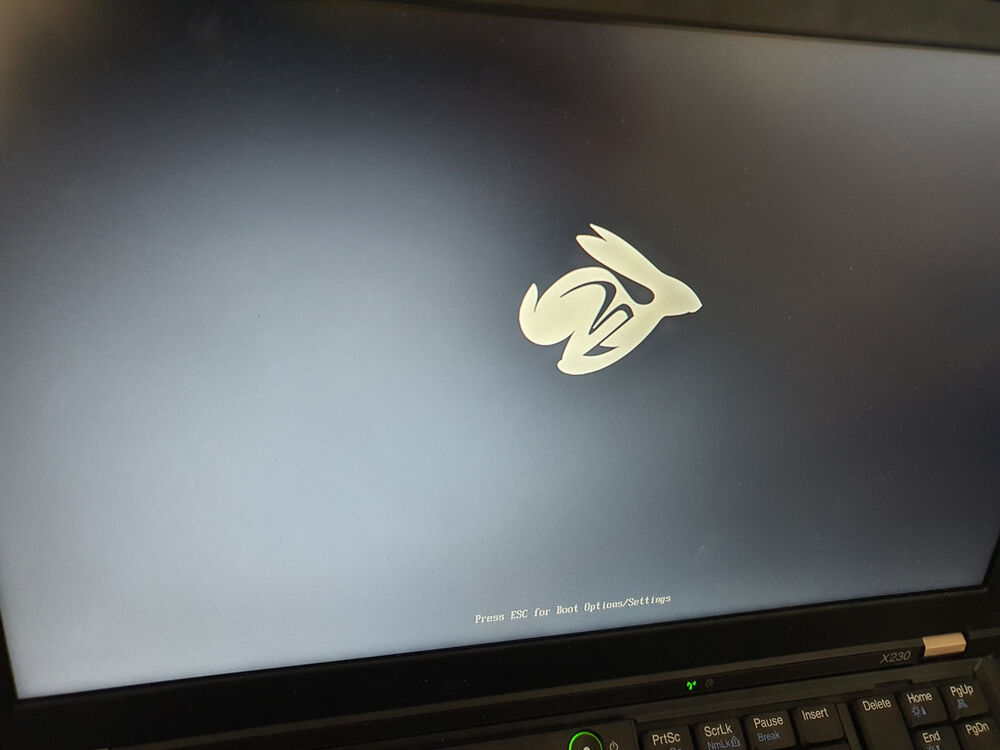
…and if all went well, power up and it should work! (except as I mentioned above, it didn’t for me at first because of TianoCore)
Hooray!
…
At the time of flashing, I insisted on UEFI since there was discussion in the Fedora community about deprecating BIOS. However, that may not be the case for a while longer, so I might try SeaBIOS – my friend is using SeaBIOS and it just boots so damn quickly.
As an added bonus, I wanted to add in that I wanted to use my spare X220i to practice flashing first… but it had the style of BIOS chip that we didn’t know how to attach properly to (the ’legs’ were tiny).
Luckily, my friend’s X220i didn’t have this issue. If anyone knows how to attach to these easily, please do let me know! :)