![[My face!]](/assets/profile.jpg) Nicholas Tay
Nicholas Tay
2022-02-11
Iris: My daily-driver split keyboard
Contents
The Keebio Iris Keyboard Rev. 4: it has been my primary choice of input for about 6 months now, and I’m quite happy with it! I’ve paired it with Gateron Yellow switches, XDA-profiled keycaps and a rotary encoder.
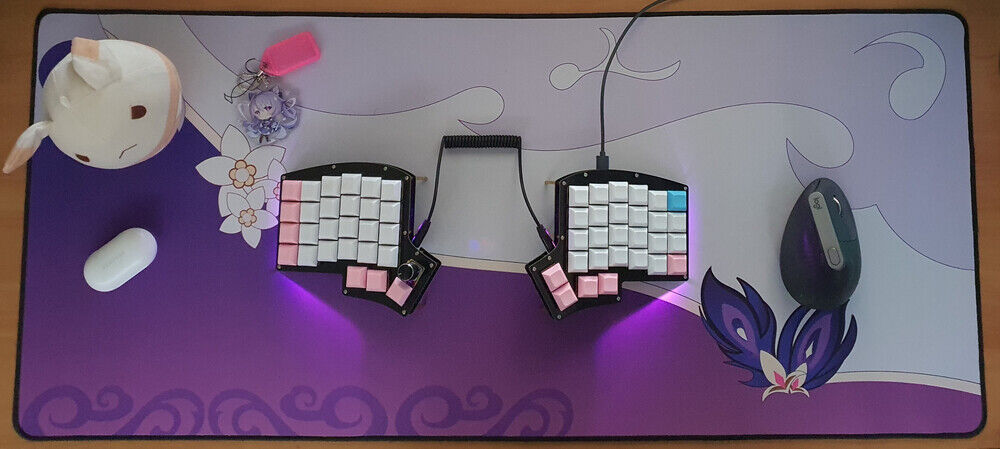
(Apart from the keyboard, there’s a few Genshin Impact-themed items and my mouse of choice, the Logitech MX Vertical. The deskmat is a relatively new addition, and is a custom print of this deskmat graphic from Reddit – thanks /u/jeryco25 for an awesome design!)
Using the board
It took me about 2 weeks to really get comfortable, but since the keyboard basically has all the letters and numbers in a QWERTY layout, the hardest part was adjusting to the “columnar staggered” linear layout, and (to a lesser extent) the missing symbols. But after a little bit, it actually turned out to be quite comfy, with the symbols actually being easier to type since I didn’t have to reach anymore – just use a function layer!
Before using this keyboard, I used to never type properly. I learnt typing through playing games! My left hand would just hover around WASD, and I would somehow type at up to 120WPM like that. Due to the staggered layout, it feels as if this board forces me to type properly – but it’s a good thing! Feels like it’s better for my hands, and I’m able to type at the same WPM as before :D.
About building the board…
Just like this blog post, I had put off actually building the keyboard for a while… the original plan was to lube the switches, but I decided to forget that and just build the damn thing so I could use it. In hindsight, I really should have at least make the switches hotswappable so I can test other switches/lube the switches later, but what’s done is done now (resoldering time??).
This project was my first real foray into hardware and any sort of ‘proper’ soldering, and I have to say it was simultaneously easy, but hard at the same time. I really didn’t want to mess any of my components up, and despite my crappy soldering skills, I’m happy to report the keys are still working (I’m using them to type up this post!).
Tenting?
Another thing with split keyboards in terms of ergonomics that I wanted to try out was tenting, i.e. tilting the keyboard up in the centre, to have it more angled to my hands. Funnily enough, I came across this post about tenting on a budget on Reddit.
For now, it’s suprisingly effective and cheap: the keyboard is already put together with brass standoffs, so all I needed was more of them. If you look carefully at the image above, you’ll see there are more standoffs towards the centre.
The only issue with this setup is the keyboard can slide around on the desk without a deskmat. Luckily I got one just before building this keyboard, so it’s a non-issue for now. On the outer sides though, I have put some 3M rubber feet on them, and I’m yet to put some heatshrink on the inner brass standoff ‘feet’ to have more friction (as suggested by the Reddit thread OP). I believe that should stop the sliding-around problem on smoother services.
Technical setup
The keyboard comes with the amazing QMK Firmware, which basically allows limitless customisation of the keyboard through C code. However, in the initial stage where I’m trying to figure out the layout I like, this turns out to be quite the annoyance, particularly when I’m on Windows and setting up the whole toolchain is a real pain.
That’s where VIA comes in. This was such a blessing in those intial stages, as all I had to do was use the VIA utility to update bindings, rather than having to flash the microcontroller every time. All I needed was the VIA-compatible QMK firmware flashed.
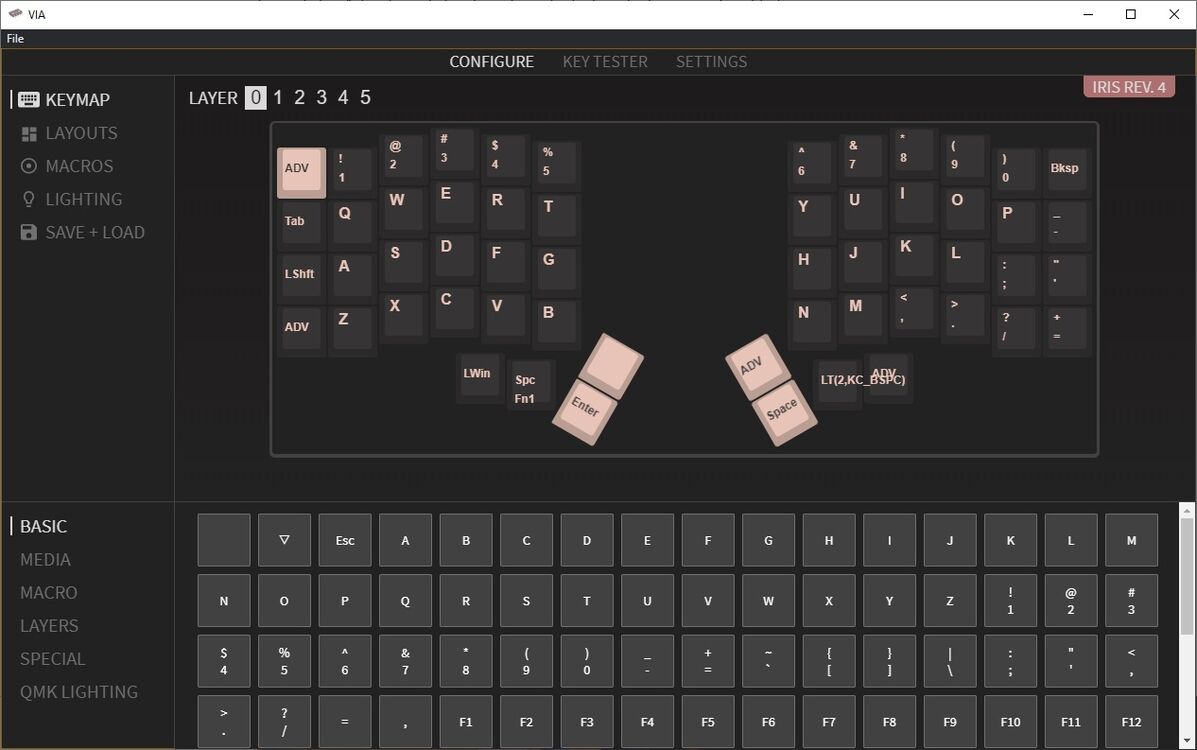
A note here!: remember to backup the VIA config before flashing a new QMK firmware… otherwise it sometimes forgets the config. I’m not sure when this happens, but it seems inconsistent – better to be safe than sorry!
So talking about flashing, the easiest way I found was to just reuse a Debian VM I already had setup last time for the fresh tomatoes stuff. What’s nice, however, is I can setup a USB filter in VirtualBox for just the microcontroller DFU mode – that way, the keyboard HID device is attached to my Windows for regular typing, but when I reboot the keyboard into flashing mode, it automatically goes over to the VM, ready to be flashed! Then when flashing is done, the keyboard automagically comes back to the host.
But also as it turns out, since we still have the QMK firmware underneath, we can customise more things under the hood, such as the virtual mouse and its acceleration. The only drawback is VIA uses up quite a bit of the microcontroller ROM space – so we can’t have all the additional QMK nice things enabled. But now after 6 months, I haven’t touched my keyboard layers in ages, so I might migrate over to a static C QMK config some time (but sometimes it still is nice to customise a layer on-the-fly for games…).
A copy of my VIA config can be found here: https://gist.github.com/nicholastay/af6cf94917634ba71823f3f49223454b. My customised VIA-compatible QMK firmware can be found it my fork, here: https://github.com/nicholastay/qmk_firmware.